Thursday, July 31, 2014

DIY Super-sized Chalkboard

I have been going a million miles an hour lately trying to prepare for the baby, getting all of the major renovations ready before the baby shower, and making sure my daughter is happy and entertained while on summer vacation.  So, I decided to take some time out for some fun crafting that would allow my daughter to feel included in all of the hubbub going on, AND keep her entertained...yay for killing two birds with one stone! I decided to make her a super-sized chalkboard for her room. She already has a chalk table and art corner, but I wanted a larger space for her to just go crazy with.  This ended up being really easy, so I wanted to share with all of you how to do it, so you could put something neat and totally different in your little ones room!

Materials:

1) Cricut with cartridge to choose your desired pattern. You can use anything, or freehand it, but I can't draw so my cricut is wonderful.

2) Chalkboard paint

3) Paint roller & Tray

4) Scrapbooking tape

5) Stencil

Step 1: Draw your stencil.
You can do this in a number of ways, if you are able to draw, then you can free hand your desired picture either directly on the wall in the size you want it, or on a smaller paper and have it enlarged.  I used my cricut to draw my stencil so I will show you how to do that. 


I used the Give a Hoot cartridge because my daughter's room is owl themed, and the shadow function gave me a nice silhouette picture. 


To draw the silhouette you need to take out the cutting blade from the machine and replace it with a marker. To do this you will unscrew the metal knob until the case opens and you can take the cutting blade out.


Once the blade is out you will put the marker into the carrier, put the screw back in place and tighten (basically the opposite of how you took the blade out.


You will have a nicely drawn picture at then end of this. It doesn't matter what color you choose, you just want to make the picture as big as you can with your machine.  This will make it easier for it to be blown up.

Step 2: Blow up your picture
Again, if you can draw freehand the size you want, go for it! But for us less gifted crafters I suggest going to FedEx office. They will blow up your stencil picture for very cheap. I did a simple black & white print out and had it blown up to 3 ft X 2ft and it was about $6!

Step 3: Cut out the stencil.
Now that you have your HUGE stencil printed out, you need to cut it out to actually make a stencil. make sure you cut at the very left of the stencil line. You don't want to cut it to far out because that may make your stencil too big.


Step 4: Tape up the stencil.
Now that your actual stencil is cut out, you need to tape it up on the wall where you want it to be.  You NEED to make sure the stencil is completely taped down. I spent a good 10-15 minutes making sure that every possible opening is taped down. If you don't tape it down you will get massive bleeding under your stencil, and then you will not achieve the desired shape. And you'll have to do a lot more painting to correct the bleeds.

Someone wanted to be Vanna White!

Step 5: Begin painting
Place a small amount of the chalkboard paint into the tray and place a small layer of paint onto your roller and begin painting. You want to put a light layer of paint on the wall, making sure to leave about a 1/2 inch to 1 inch space before you reach the stencil. Once you paint the inside of the stencil with the roller, take a smaller paintbrush and paint the 1 inch space remaining.  You can paint directly onto the edge of the stencil with the brush.  I found this helped to keep the paper down and prevent bleeding on the next coat and I had more control with the amount of paint that was on the brush rather than the roller. By using the brush I felt I was better able to control the bleeding under the stencil.

This is an AMAZING chalkboard paint! The best I've used, I only used maybe a quarter of the can for this project. I purchased it at homedepot.com for on $20!
Make sure to leave about an inch of space before you reach the end of the stencil.

Use the small brush to fill in the space and go slightly onto the stencil to help hold it down.

You want to do AT LEAST two coats of the paint before moving to the next step. You need to wait about FOUR HOURS in between coats.  Even if the paint feels like it's dry, it needs to dry all the way through before you paint another coat.  I had the fan on, both windows open, and it was about 100 degrees outside and I still waited four hours. Once you've done the second layer you need to let the paint dry and set for FOUR DAYS. Do not write on the board during this time!

This is what it will look like after two coats. The paint should be DARK.


Step 6: Add Scrapbooking tape
This step is optional, but I think it gives the chalkboard a finished look. I purchased a roll of three scrapbook tape from Michael's for about $4. I then edged the entire chalkboard in the tape.  This allowed me to easily cover any small bleeds that occurred, and gave the chalkboard a nice boarder. Be aware that one roll of tape is not enough to cover the entire board, so either plan to use multiple patterns or by multiple rolls of the same tape. My daughter wanted to use multiple patterns so that's what we did.
As you can see, we make the "face" of the owl a different pattern, that's what my daughter wanted, and I figured it's her room so why not!

Step 7: Set your board.
This is VERY important. You need to set your board to make sure it holds the chalk effectively. Basically what you are going to do is take a piece of chalk and cover the entire board with it, every inch. Then you will erase it. You can do this once or a couple times.  When you first put the chalk on you will see a lot of chalk dust falling off, the more you set the chalkboard and the longer you use it, the less dust you will see falling off. This is because as the board  sets it's able to hold more of the chalk on it.
My daughter helped me, as you can see, but this is basically what setting the board looks like. Cover the board in a thick layer of chalk making sure to cover every inch of it. You can do this before you put the border on if you prefer.

The next step of setting the board is to completely erase the chalk. You want to do this soon after you cover the board because the powder that remains will help hold more chalk onto the board.


Here is what the board looks like completed. Note the amount of dust on the carpet under the chalkboard, this has decreased a lot the more my daughter uses it. Hence the importance of setting the board.

I hope you all found this helpful. It's a really fun project that the kids can even help with. And the thing I like about it the most is that it's completely customizable to your kid's room. All you have to do is find a shape that fits with your child's theme! Happy crafting!!!


Monday, July 28, 2014

50 Practical Uses For Coconut Oil


I don't know about you guys, but I never realized how many uses there are for coconut oil! Sure, I knew that it was a great natural way to get rid of diaper rash, but after that I was clueless.  However, while searching for natural safe remedies and products I found there TONS of practical uses for coconut oil. I've seen dozens of info graphics, and read countless articles about all of the uses for this magical substance, and that's truly what it is. So, I decided to compile all of the information I have found into a nice easy list of uses for all of you.  Let me know if there are any uses I missed!

*NOTE:* I am NOT a doctor or medical practitioner in any way. Do NOT stop a current medicinal regiment without first discussing it with your health care provider.  When starting a holistic remedy you should discuss it with your practitioner as well, even if you are not stopping any medications, just because something is natural does not mean it can not interact with modern medicine or have a negative effect on some people--remember cocaine and ephedrine are both naturally occurring but have negative effects on the human body. So discuss everything with your health care provider first!

Uses for Coconut Oil


1.) Reduces Frizz: put in hair and watch the frizz go away! Added bonus, it will also soften, shines, and repairs your hair!

2) Put on your skin to reduce wrinkles, exfoliate skin, moisturize, and give a more youthful appearance.

3) Diaper rash cream: Natural remedy for diaper rashes. Note: NOT cloth diaper friendly, you will need a barrier (like a fleece liner) between your baby and the diaper when using this.

4) Reduce earache pain: mix garlic, olive oil, and coconut oil together and put a couple drops in your ear to reduce earache pain.

5) Moisturize & Protect: coconut oil has double power in that it can act as a shaving cream and after shave moisturizer.

6) Bug repellent: Mix coconut oil, catnip, rosemary, and mint essential oil for an all natural DIY bug spray.

7) Cradle cap: put coconut oil on baby's head alone, or mix with Shea butter, calundula and chamomile for a creamy blend. (this mixture can also act as a diaper rash cream).

8) Body Scrub: Mix coconut oil with brown sugar and get a homemade body scrub!

9) Toothpaste: Mix coconut oil with baking soda for a great homemade toothpaste.

10) Gum residue: Use coconut oil to get rid of gum residue-very helpful with getting stuck on gum out of clothes.

11) Condition wood: Just rub some coconut oil onto wood, let it sit and then rub off with a clean cloth and you will have freshly conditioned wood!

12) Un-stick a zipper: add a couple drops of coconut oil onto a stuck zipper and watch it come undone!

13) Prevent hairballs: Add coconut oil to your cats food and it will help prevent the occurrence of hairballs.

14) Condition fur: While giving Fido a bath, add some coconut oil into your wash routine and wash his fur glow.

15) Increase milk supply: For nursing mothers, taking at least 3 1/2 tablespoons of coconut oil a day may help increase your milk supply.

16) Morning sickness: Extra virgin coconut oil has been shown to help relieve morning sickness in pregnant women.

17) Stretch marks: Rubbing coconut oil on a pregnant belly may help prevent/reduce stretch marks. You can also rub coconut oil on cracked nipples during breastfeeding.

18) Constipation: Coconut oil is a light laxative.

19) Vapor rub: mix coconut oil with essential oils for a homemade vapor rub to reduce congestion.

20) Teething: Rub coconut oil onto the gums of teething babies as a natural pain reliever.

21) Thyroid function: Coconut oil naturally helps optimize thyroid function.

22) Coffee/tea creamer: Add to coffee or tea for a natural creamer.

23) Reduce joint pain: Coconut oil has anti-inflammatory properties so it can help decrease joint pain.

24) If ingested daily, coconut oil can help with allergies, digestion, and eczema.

25) Cold sores: add onto lips (as lip balm) and coconut oil will help heal cold sores.

26) Cuticles: Is a natural cuticle moisturizer and healer.

27) Sunscreen: Coconut oil naturally acts as an SPF 4 sunscreen

28) Add flavor to GF bread: When used as a spread, coconut oil will act as a moisturizer and flavor for gluten free bread.

29) Hormone production: When taken naturally, coconut oil can boost hormone production.

30) Hemorrhoid relief: Put on hemorrhoids topically to reduce pain.

31) Sunburn reliever: Coconut oil acts as a natural sunburn reliever, just put on the burn.

32) Chicken pox & poison ivy relief: Rub on affected area and coconut oil will relieve the itch associated with both chicken pox and poison ivy.

33) Mosquito bites: Coconut oil will also reduce the itch associated with mosquito bites.

34) Lip exfoliate: Mixed with sea salt, coconut oil rubbed on lips acts as a natural lip scrub.

35) Treatment of athlete's foot/foot fungus: Rub coconut oil on your feet daily until the fungus is gone.

36) Reduce cellulite: When rubbed on problem areas consistently, coconut oil can help reduce the appearance of cellulite.

37) UTI's: Can be used externally and internally to speed up the recovery from UTI's. (talk to your health care provider before implementing).

38) Baby lotion: rub on baby's skin as a natural baby lotion.

39) Yeast overgrowth: When ingested regularly, coconut oil can help reduce your chances of developing a yeast overgrowth.

40) Heartburn & Indigestion: Mix coconut oil with warm ginger tea to reduce heartburn and indigestion (great for pregnant ladies).

41) Avoid dry skin: Rub on your hands after doing the dishes to prevent dry skin.

42) Varicose veins: Rub on effective areas to help reduce the appearance of varicose veins.

43) Hair growth: Rub coconut oil into your scalp to help stimulate hair growth.

44) Age spots: Rub directly onto the effective areas to help reduce the appearance of age spots.

45) Massage oil

46) Facial moisturizer: Rub on your face before bed for an intensive night-time facial moisturizer.

47) Seasoning: When used in conjunction with a cast iron skillet, Coconut oil does a great job of adding seasoning.

48) Leather shoes: Coconut oil is great at moisturizing and conditioning leather shoes.

49) Furniture polish: Does a great job polishing wooden furniture.

50) Pet allergies: Use coconut oil sparingly on pets with skin allergies to reduce irritation.

Sunday, July 27, 2014

Going Green: Unpaper Towels


If you guys are following this blog at all, you know that I am working to make my home and life as "green" as I can, granted I'm not perfect, I have been making a lot of changes in our home. On Friday I received my order of unpaper towels from FabricBunches, an AMAZING shop on Etsy! I was SO excited when I saw these in her shop, I sent her a message right away.  Jen, the shop owner and maker of these amazing items was WONDERFUL!  We messaged back and forth with each other for probably a week or so trying to figure out what style and design I wanted. She was SO FAST with her responses and worked so hard to make sure I got exactly what I wanted.  We went back and forth, for so long and she was always so nice, and quick with her responses. She really bent over backwards to make sure I received the exact towels I wanted...she even special ordered fabric for me! If you want to see the items in person and hear a little more about them, check out my July Favorites video on my YouTube channel for a more in-depth description.


Seriously, Jen worked so hard to do everything she could to get my order exactly right. 34 messages and never once did she take more than 24 hours to respond, or make me feel like I was being too picky (but I know I was).


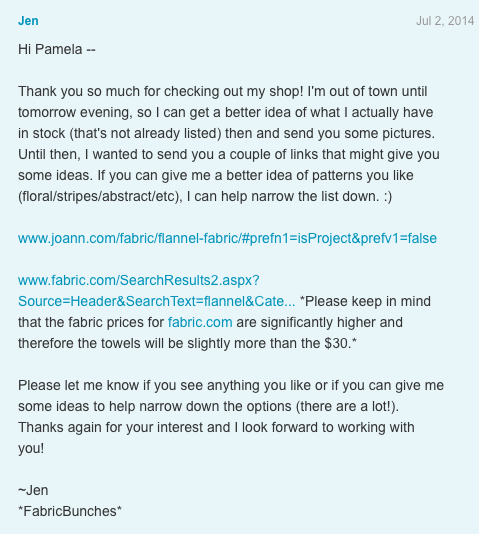
She sent me websites with fabric swatches for me to review to see if there was anything I liked that she would then order for me.


Seriously guys I even sent her a picture of my kitchen for her to be able to find coordinating fabric so everything went nicely together. SHE WAS SO HELPFUL!


The best part, is after all of our back and forth, she was completely honest with me on what she thought would look nice.  As you can see in the messages above she was not afraid to tell me if she didn't think colors or patterns would work well together, and I personally like that.  I LOVE to work with a shop owner that is SO DEDICATED and who will be honest with me and not just be a "yes man" and have me end up with a not so nice looking product. Also, if you look at the message dates you will see that my message and her response were on the same day, on this particular day we went back and forth a number of times.So I would say that a 24 your turn around time for a response was the LONGEST I had to wait, most of the time I received a response within hours! I have worked with a lot of Etsy shops in the mast couple months and FabricBunches definitely is one of my favorites!

So not only was the customer service and my overall experience wight he shop AMAZING, the product is AMAZING as well! I received the towels about three days before the due date which was wonderful and they are exactly what I wanted.  The colors of the patterns are so vibrant and look exactly like the swatches did.  The stitching is amazing! Very strong stitching that when I inspected it didn't have any loose threads or fraying.  All of the cuts are straight and even on both sides. The two long sides of each towel have three snap buttons on them which allow you to snap all the cloth towels together and then roll them up just like a regular paper towel so they can fit on your paper towel holder! The snap buttons are very strong and put on perfectly, they are all even so you won't have any difficulty lining them up.


The towels come with two different sides, one side is a very SOFT patterned flannel material that is perfect for cleaning up messes where you are concerned about streaking. I use this side to clean messes from my fridge or off of my wood floors, and it doesn't streak at all, the flannel does a wonderful job absorbing the liquid without leaving any streaks.  The other side is a solid color terry cloth which is perfect for larger messes where you need more absorption. I use this side when my daughter spills her drink on the table, or on our couch. The mess is absorbed so quickly and efficiently.

Once I have used the towel I personally like to rinse them off, just to make sure that they don't stain (this is not a necessity though) and then you just put them in either a wet bag or grocery bag until you clean them. To clean them, you just toss them into the washing machine and then into the dryer without fabric softeners and you are good to go! I have had these towels for only a couple days and I am SO happy with them...even my husband uses them and likes them!!! I will absolutely be ordering from FabricBunches again, the speed, customer service, and QUALITY of the item is simply amazing, especially for the price!!!! SO, here are MY unpaper towels from FabricBunches, and I will certainly be ordering more...and soon!


Aren't they the cutest things you've ever seen! I am SO in love with these, it's not even funny. You have GOT to go check out FabricBunches as she has unpaper towels, cloth wipes, wet bags and so much more! And the BEST part (besides the amazing products) is that Jen, the shop owner and creator, has generously decided to offer a shop coupon for 15% off of your order! Simply type in BUSYMOM15 at checkout and get your 15% off!!! This coupon is good until September 30, 2014 so hurry over and see her amazing products, you will be blown away just like I was!!!!

Saturday, July 26, 2014

Baby Boy Nursery: Hubcap Name Sign

I have been a busy mama bee these past couple of days, trying to do all of the projects I need to get done, have summer fun with my daughter, and film more YouTube videos. One of the projects I finished this week was the name sign for baby Charlie's nursery. I LOVE name signs, I recently made a new one for my daughter which I am in LOVE with.  The sign for my son's room took a little longer to do because I had to get hubcaps for it! to only did I have to get hubcaps but I wanted used hubcaps and I didn't want them all to match, so this made things a little more difficult.  Eventually my amazing husband went on a hubcap finding mission to a swap meet in a neighboring city and found exactly what I wanted! I quickly got started with the project, and of course, I took pictures along the way. I hope you enjoy!

Materials:

1) Hubcaps (make sure you have enough for your child's name)

2) Wooden letters

3) Paint and paint brushes

4) Glue gun

5) Hanging materials (this depends on what style of hubcap you use, we used two different hanging methods for this project)

Step 1: Clean the hubcaps

This is only necessary if you are using used hubcaps. Remember they were on cars for God knows how long and have been through numerous places, so make sure you scrub them GOOD with hot water and soap. Make sure all the grease, grit and grime are OFF. I washed until the water ran clear then let them air dry.

EEWWWW!

Step 2: Paint your letters

I did this while the hubcaps dried. Make sure to do two layers of paint so that the wood is completely covered. You also want to make sure you paint EVERY ANGLE of the letters. They will be up on display so you have to make sure that no matter how someone is looking at them, they will only see painted wood.

Make sure you cover every angle with the paint!!

Step 3: Glue on letters

Once your paint and hubcaps have dried you will then glue the letters onto the hubcaps.  Before you do any gluing I suggest laying out the hubcaps on the floor in the order they are in, and then placing the letters on the hubcap where you are planning to glue it.  This will allow you to 1: see if the order of you hubcaps looks good (this is especially important if you are using non-matching hubcaps) and 2: you can make sure that your letter placement looks nice. Once you are certain with your hubcap layout and letter placement you can go ahead and glue.


Step 4: Hang the hubcaps

Once the glue has dried you can begin hanging the hubcaps. What you use to hang them depends on how the back of the hubcaps looks. The majority of the hubcaps I used had a ridge on the end so I could just put a hook on the wall and hang them.  However, I did have one that didn't have that ridge and only had screws on the back. What we did is my husband loosened the two of the screws that were across from each other and then wrapped the ends of a metal wire around each screw and tightened them.  This basically gave us a place to hang the hubcap from (kind of like a picture). When it was time to hang up the sign I first found my center letter. My son's name has seven letters so I counted in thee letters on each side and that middle letter was the center of his name.  I then measured the length of the wall and found the center of the wall. Once I did that, I hung the center letter at the center point of the wall. This allowed me to ensure that the sign would be centered.  I then worked my way outward on the sign (moved from the center letter to the next letter to it's left and so on) until I reached the first letter of the sign and then did the same for the end half of the sign.  This ensured that all the letters were even and the sign was level. When I hung the hubcaps I leveled them based on the height of the hubcap. This was easier than using the letters as a guide for me, but you can do whatever is easiest for you.

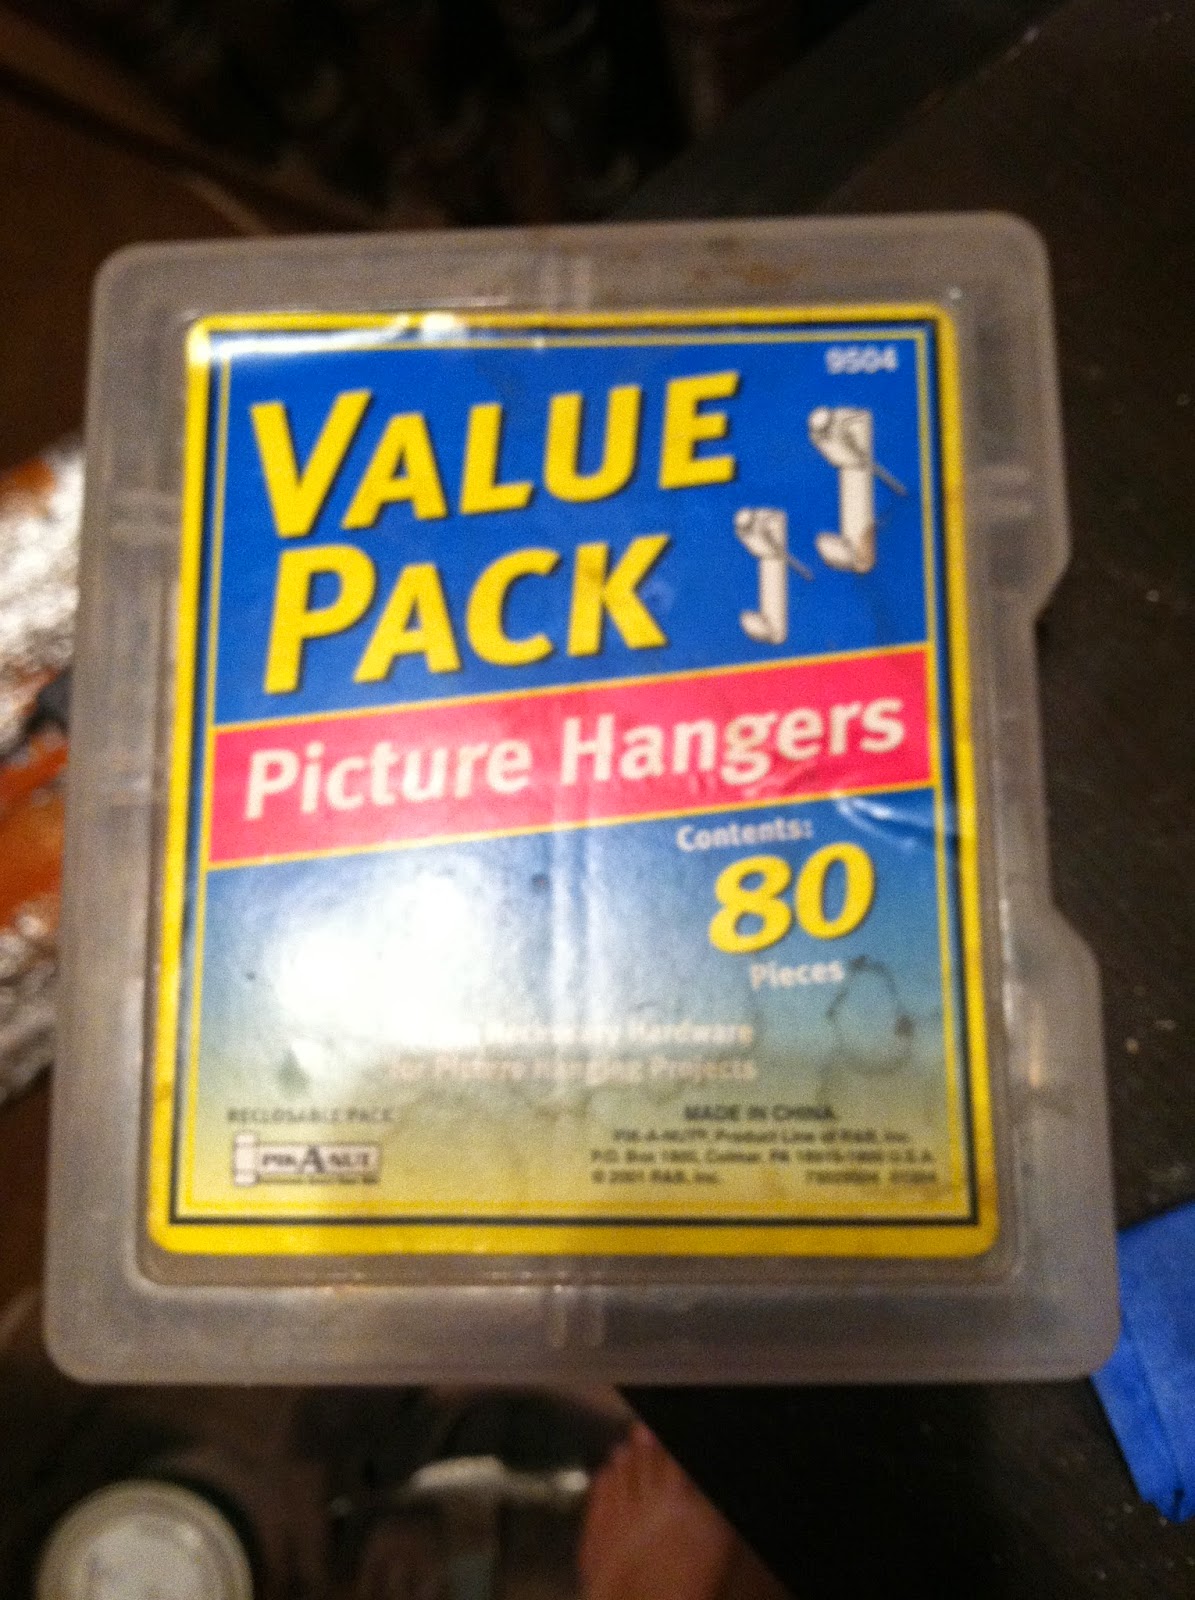
I used picture hangers to hang the majority of the hubcaps.


These are the hooks I used. There was a hole for a nail to secure the hook to the wall, and then the hubcaps are attached by the bottom hook.

Finished Product:

This was a super easy project, however it was very time consuming in that it required a lot of planning out an precision in hanging, but I think it was worth it and the outcome is really cute! To see the other projects I've done for his nursery see the links below.


ALSO, don't forget to SUBSCRIBE to my YouTube Channel, for room tours, update, and other fun stuff!

Friday, July 25, 2014

Summer Days & Trying Not to Melt

It has been a HOT past couple of days over here, and being 7 months pregnant and having an active preschooler makes these days even more stressful.  I've been searching for some easy, fun, and COOL activities for us to do when its 100+ degrees. I know there is always the pool, but I don't want to be anywhere NEAR a bathing suit right now! LOL So yesterday we went to a local magic show, and then had some fun with bubble rap! What are some fun, cool activities you guys do to keep your little one cool and happy during these long summer days?


Thursday, July 24, 2014

Earth Baby Boutique Visit


So yesterday a friend and I went and visited Earth Baby Boutique in Sherman Oaks, and it was AMAZING!  It is a store that is geared towards moms, babies, and young kids, and carries all natural, organic, chemical free items that are Eco-friendly! It is such an amazing store, I was in HEAVEN when I went! I spoke with one of the girls who works there, Jennifer, and she was SO helpful. She was happy to answer all of my questions, she showed me around the entire store, gave me informational products, and instructions for new products I had never tried before.  The store even has a section that holds baby related business information, a lot from local moms, like Douala's, prenatal chiropractors, cloth diaper services etc. Not only that but they also host monthly events in the store! Some of these are free like the baby wearing seminar or the Q & A with Dr. Berlin (last meeting was about pre and post natal chiropractic services and benefits), other events require payment (like their 6-week baby music class) but they have a calendar of events on their website and you can register for events from their website! SO convenient for busy moms.  Here are some photos from my visit so you can see just how amazing this place is! Also, if you want to see a full video tour and a HAUL of all the amazing products I purchased check out my YouTube Channel and check out the video!!!

The front of the store-so cute!


This is just SOME of their cloth diaper selection, and their ADORABLE cloth wipes.

 They carry so many natural product, and hand made baby shoes from a local mom!

Getting ready to go back to school? The have renewable, Eco-friendly lunch boxes and food storage containers.

 Having a difficult time with teething? They have amber necklaces! 

How do amber necklaces work? I personally have never used amber necklaces for teething, so I wasn't sure how they worked. Jennifer was kind enough to give me a detailed breakdown of how they can help your little one.  Amber is petrified tree sap, and Jennifer was telling me that through the petrification process, natural oils are held within the amber. When the amber has contact with a person's skin the oils are gradually released and absorbed through the skin.  The oils once in the system help to alleviate pain and muscle soreness so they can have a relieving effect on a baby that is having a difficult time teething.  And if used in conjunction with teething oil (they have some in the store-all natural) the effects are multiplied.  I may have to try that once baby Charlie comes and is teething.

THE BACK OF THE STORE:

The majority of the store is contained in their back room, and it is wonderful! This is where the hold their classes, playdates, and lectures, and you can tell that is is build by a mom for other moms! It is so roomy and has everything a mom could want: bouncer chairs for babies, a play area for older kids (my daughter spent the entire time playing back there), large pillows to sit on, yoga mats, a table full of local mom services, and of course SNACKS!!


The play area for the older kids 

Resources for mom.


I'm telling you, you guys, this store is a mom's DREAM! I was so excited to leave the store with all of my stuff because for the FIRST TIME I KNEW that every product I had in my bags was free of any ingredient that could hurt my kids! I don't have to worry about chemical burns or negative effects (unless of course your child is allergic to one of the natural ingredients, so please read the ingredients list). And it was AMAZING to be able to not just read, but UNDERSTAND the ingredients list on my kid's products! I'm serious you guys, if you are in the Southern California area, you MUST go and see the store, and go to one of their events! If you're not in the area, go to their website and check out all of their amazing products...I was in heaven! I'm serious, look at all the stuff I got! If you want to see a full store tour and a full HAUL of all the products I purchased (with links) check out my YouTube Channel for the video about my experience!