As I've mentioned before, I am in full new house decoration mode and it is AMAZING! My creative juices are flowing and my DIY senses are tingling! Okay, enough of that corniness. A few weeks ago a friend of mine posted a picture of this beautiful fabric cross decoration a friend of hers gave to her, and I instantly fell in love! Of course I searched etsy and needless to say at about $30 before shipping I decided that I could make one for at least half the price. It's not exactly like the ones on etsy (I used canvas instead of wood) but for what I was going for it worked perfectly. I had almost all of the materials already so it only cost me $7 in fabric and a flower. If you had to buy all of the items I think you'll be at about $15-$20, and of course there are always sales and coupons that could help you out, but either way you're going to save money and have a lot of fun too!
Supplies:
- One (1) 12 X 12 canvas- I used the one left over from my Mr. & Mrs. Signs
- Paint- I used the Tim Holtz Distress paint in squeezed lemonade
- One (1) yard of cotton fabric
- Adhesive- I used my hot glue gun and small push pins
- Paint brush
Step 1:
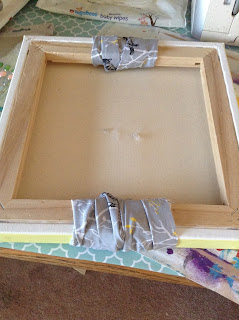
You first need to paint your canvas. If you're using the distress paint just unscrew the cap and pour a nickel sides amount onto your canvas and spread it onto the canvas, including the sides. You don't need to do too many coats of paint, just enough to cover the canvas in paint. I ended up using only one coat of the distress paint.
Step 2:
Next lay your yard of fabric out and cut it in half. Then place one half over the canvas (once it's dry) and find the middle and glue it down with your adhesive. You only need a small dot in the center, you want the rest of your fabric loose for folding. Then start to fold your fabric like a fan, making sure to glue each fold to the center.
Step 3:
Continue to fold the fabric and glue each fold on both sides. Make sure to try to get the folds as close to the middle as possible and have them laying flat. If you're using super glue you don't need to do anything else. However, since I used hot glue I put small push pins directly through the fabric folds into the canvas. If you do this make sure you push the point down so that you don't have any sharp point in the back of the canvas. I also put dots of hot glue over the point for extra security.
Step 4:
Once your folds are all secure flip your canvas backward and cut the extra fabric making sure to leave about 1 1/2 inches. Before you secure the excess fabric go over your folds and make sure they are straight and organized, like you would want them to look on your finished project. Then put down a layer of glue on the back and inside edge of the canvas and fold the excess fabric over the edge and tuck it between the canvas and wood. You may need to put some additional adhesive where the fabric folds onto of itself to make sure everything is secure.
Step 5:
Take your second piece of fabric and lay it down perpendicular to the fabric you just finished working with, remember you want your finished result to be a cross. Now repeat steps 2-4 with this section of fabric, making sure it is secured in the middle of your canvas.
Step 6:
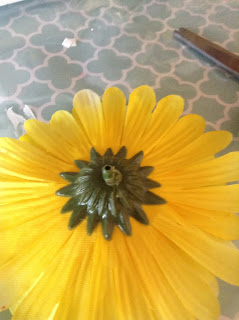
Now its time to hide all of your adhesives and pins. Take your flower and first cut off the stub that sticks out from the back. It's the section that connects the flower to the stem, make sure to cut it as close to flush as you possibly can.
Once everything is cut and flush put a generous dab of glue and place it directly in the center of your cross. I also went and glued down some of the bottom petals just to help make sure it was completely secure.
There you go! I hope you all enjoyed this little tutorial, and I'd love to see what you all made! Feel free to post your pictures on our Facebook page. Happy crafting!


No comments:
Post a Comment